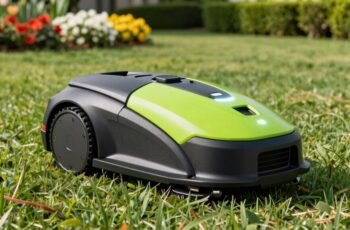
When it comes to maintaining the efficiency of your robot mower, neglecting the battery can be a silent threat. Like any critical component, understanding when and how to replace it is essential for peak operation. Properly managing this process ensures longevity and safety, yet many overlook the nuances involved. As we explore the key steps and precautions, you’ll gain clarity on a task that can greatly impact your mower’s performance — and knowing more could prevent unexpected downtime.
Key Takeaways
- Identify signs of battery decline, such as longer charging times and reduced runtime, before replacement.
- Select a compatible battery matching voltage, capacity, and dimensions for your specific mower model.
- Safely remove the old battery by disconnecting terminals and supporting it during extraction.
- Properly install the new battery, ensuring correct polarity, secure fitting, and clean compartment contacts.
- Perform power cycling after replacement to reset the system and verify the mower operates smoothly without errors.
How to Identify When Your Robot Mower’s Battery Needs Replacing
Over time, a decline in your robot mower’s battery performance indicates it may need replacing. You’ll notice increased charging times, where the battery takes longer to reach full capacity. Reduced runtime is another clear sign, as the mower cannot operate effectively on a once-adequate charge. Additionally, frequent power interruptions or unexpected shutdowns during operation suggest battery deterioration. Pay attention to abnormal heat generation during charging or use, which can signal internal degradation. If the mower’s efficiency drops despite proper maintenance, and the battery no longer holds a consistent charge, these are technical indicators the battery has aged beyond ideal performance. Regularly monitoring these signs helps determine when a replacement is necessary to maintain consistent mowing efficiency and avoid operational failures.
Choosing the Right Replacement Battery for Your Robot Mower
Selecting the correct replacement battery for your robot mower is essential to guarantee excellent performance and longevity. The battery must match the original specifications precisely to ensure efficient operation and safety. Critical parameters include voltage, capacity (Ah), and physical dimensions. Mismatched batteries can cause malfunction or damage. To assist in selection, consider the following:
| Parameter | Specification | Importance |
|---|---|---|
| Voltage | Matches original (e.g., 18V, 20V) | Ensures correct power delivery |
| Capacity (Ah) | Same or higher than original | Extends runtime |
| Dimensions | Fits in the designated compartment | Prevents fitting issues |
Always verify compatibility with your mower model before purchase to avoid operational failures.
Step-by-Step Guide to Safely Removing Your Old Battery
Removing the old battery from your robot mower requires careful attention to safety and precision. Begin by disconnecting the mower from power, ensuring it is completely off. Wear insulated gloves and use insulated tools to prevent electrical contact. Carefully locate the battery compartment, then follow these steps:
Always disconnect power and wear insulated gloves when removing your robot mower’s battery for safe handling.
- Remove any protective covers or panels securing the battery.
- Disconnect the battery terminals, starting with the negative terminal, then the positive.
- Gently lift the battery, supporting its weight to avoid dropping or damaging surrounding components.
- Check for any adhesive or fasteners, removing them carefully if present.
Always work in a well-ventilated area and keep the workspace free of conductive materials. Properly handling the old battery minimizes risk and prepares you for a safe installation of the new one.
Installing the New Battery and Ensuring Proper Connection
To properly install the new battery, make sure that the compartment is clean and free of dust or debris to promote a secure connection. Carefully align the battery’s terminals with the corresponding contacts in the compartment, ensuring correct polarity. Gently press the battery into place, verifying that it seats firmly without forcing it, which could damage connectors. Confirm that all locking mechanisms or clips engage properly to secure the battery. Inspect the connection points for proper contact and absence of gaps or misalignments. Use a multimeter if necessary to verify continuity. Avoid over-tightening or applying excessive force to connectors, as this can cause damage. Proper installation guarantees maximum power transfer and prevents connection issues during operation.
Testing Your Mower After Battery Replacement
Once the new battery is securely installed, we should power on the mower and perform a series of diagnostic tests to confirm proper operation. First, verify that the mower initializes correctly, with no error messages or warning indicators. Next, observe the startup sequence and ensure the blades engage as intended. Conduct a test run to confirm smooth movement and responsiveness to control inputs. During testing, pay attention to the following:
After installing the new battery, run diagnostics to ensure smooth operation and proper mower performance.
- Consistent power delivery without interruptions
- Proper communication with the control panel
- Absence of unusual noises or vibrations
- Battery charge status and runtime stability
These checks guarantee the battery replacement was successful and that the mower functions efficiently. Accurate diagnostics prevent future issues and optimize mower performance.
Tips for Maintaining Battery Health and Extending Its Lifespan
Maintaining peak battery health is essential for guaranteeing your robot mower operates efficiently over its lifespan. Proper care minimizes capacity loss and prolongs operational cycles. To optimize longevity, keep the battery between 20% and 80% charge, avoiding deep discharges or constant full charges. Store the mower in a cool, dry environment and disconnect the battery during extended inactivity. Regularly inspect for corrosion and clean terminals with a dielectric spray. Temperature management is critical: avoid exposure to extreme heat or cold, which accelerates degradation. Below is a summary:
| Maintenance Tip | Rationale | Implementation |
|---|---|---|
| Keep charge between 20-80% | Prevents stress and capacity loss | Monitor and adjust charging cycles |
| Store in cool, dry environment | Reduces thermal degradation | Use covered storage area |
| Inspect and clean terminals | Ensures efficient power transfer | Use dielectric spray periodically |
| Avoid extreme temperatures | Preserves battery chemistry | Keep mower away from heat/cold sources |
Troubleshooting Common Issues After Replacing Your Robot Mower Battery
We start troubleshooting by verifying the battery connections for proper seating and secure contact. Next, we assess whether software calibration is necessary to guarantee accurate operation. Finally, performing a power cycle can resolve residual issues caused by the new battery integration.
Battery Connection Checks
How can you verify the battery connections are secure and functioning properly after replacement? First, visually inspect the connection points for any looseness or corrosion. Make certain that each connector is fully seated and locked into place. Next, gently tug on the cables to confirm they are firmly attached without resistance. Use a multimeter to check for continuity across the connection points, verifying that there are no breaks in the circuit. Finally, confirm that the battery terminals are clean and free of debris, which can impede proper contact. Key points to remember include:
- Confirm connectors are fully engaged
- Check for corrosion or debris
- Test continuity with a multimeter
- Ensure cables are securely fastened
These steps help guarantee your battery connection is suitable for proper mower operation.
Software Calibration Needs
After replacing your robot mower’s battery, software calibration is often necessary to guarantee peak operation. Calibration ensures the mower’s sensors, boundary recognition, and navigation algorithms align with the updated power source. Without proper calibration, the mower may misinterpret boundary lines, struggle with obstacle detection, or experience inconsistent mowing patterns. To calibrate, access the mower’s control interface and follow the manufacturer’s specific procedures, which typically involve running a calibration routine that tests sensor accuracy and boundary recognition. It’s crucial to verify that the mower’s software correctly registers the new battery’s capacity and voltage parameters. Proper calibration minimizes operational errors and optimizes battery performance, extending the mower’s functional lifespan and ensuring safe, reliable operation. Always consult the manufacturer’s guidelines for precise calibration steps tailored to your model.
Power Cycle Procedures
Experiencing issues after replacing your robot mower’s battery is not uncommon, but power cycling often provides a straightforward solution. Power cycling resets the system, clearing residual errors and reinitializing hardware components. To perform a proper power cycle:
- Turn off the mower completely using the main power switch.
- Disconnect the battery or remove it if accessible.
- Wait at least 30 seconds to ensure internal components discharge.
- Reconnect or reinstall the battery, then turn the mower back on.
This process helps resolve issues like unresponsive controls, incorrect sensor readings, or communication errors. It’s essential to ensure the mower is fully powered down before reconnecting the battery to prevent electrical faults. Power cycling ensures the mower’s firmware correctly registers the new battery and restores optimal functionality.
Frequently Asked Questions
How Long Does a Robot Mower Battery Typically Last Before Needing Replacement?
Typically, a robot mower battery lasts around 2 to 3 years or approximately 300 to 500 charge cycles. We recommend monitoring performance and replacing the battery when mowing efficiency declines or runtime considerably shortens.
Can I Upgrade to a Higher-Capacity Battery for Longer Mowing Sessions?
Yes, upgrading to a higher-capacity battery can extend mowing sessions, but compatibility depends on your mower’s design and voltage requirements. We recommend consulting your manufacturer’s specifications and ensuring the new battery matches the original system.
Are There Specific Safety Precautions During Battery Replacement I Should Be Aware Of?
Yes, we must disconnect the power source, wear insulated gloves, avoid short circuits, handle the battery carefully, and follow manufacturer instructions precisely to guarantee safety during replacement. Proper precautions prevent electrical hazards and damage to components.
How Do Weather Conditions Affect My Robot Mower’s Battery Life?
Weather profoundly impacts our robot mower batteries; just like a car’s engine struggles in extreme cold, cold temperatures slow chemical reactions, reducing capacity, while excessive heat accelerates degradation, ultimately shortening battery lifespan and efficiency.
Is It Necessary to Recalibrate the Mower After Replacing the Battery?
Yes, recalibrating the mower after replacing the battery guarantees ideal performance. We recommend following the manufacturer’s calibration procedure to reset sensors and adjust settings, ensuring accurate navigation and cutting efficiency post-replacement.
Conclusion
In summary, while replacing your robot mower’s battery might seem straightforward, it’s ironically the most critical step to guarantee peak performance and safety. Skipping proper calibration or rushing the process can compromise longevity and reliability. So, even in this high-tech age, attention to detail remains crucial. After all, a small oversight could turn a seamless upgrade into a costly mistake — but hey, at least you’ll have a shiny new battery to remind you of that.